Nutanix Calm – AWS Setup & Example App Deployment

Hello there! One of the most powerful aspects of Nutanix Calm is the ability to deploy to many different clouds. Today, I’m going to show you how to setup AWS by creating an IAM user, a key pair, register an AMI and finally deploy a pre-made blueprint to EC2. Let’s get started…
Jump to…
Part 1: Setup IAM User
Part 2: Create Key Pair
Part 3: Create Security Group
Part 4: Create AMI
Part 5: Connect Calm to AWS
Part 6: Setup Project
Part 7: Setup & Deploy Blueprint to AWS
Part 1: Setup IAM User
Browse to console.aws.amazon.com and login. If you haven’t created a “Free Tier” account, do so here: https://aws.amazon.com/free/
Once in the console, search for and click IAM

In the IAM Management Console, click Users on the left hand side

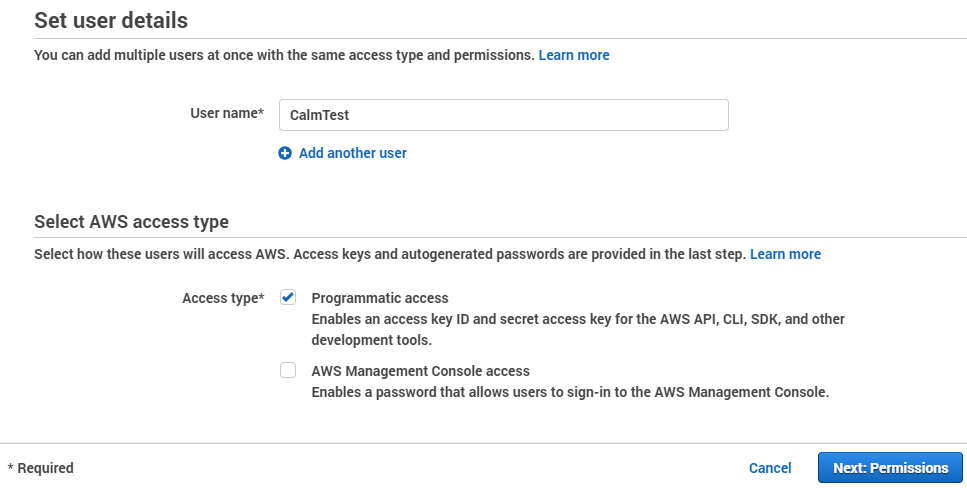
Click the Add user button which will open up the Add user wizard
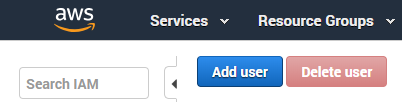
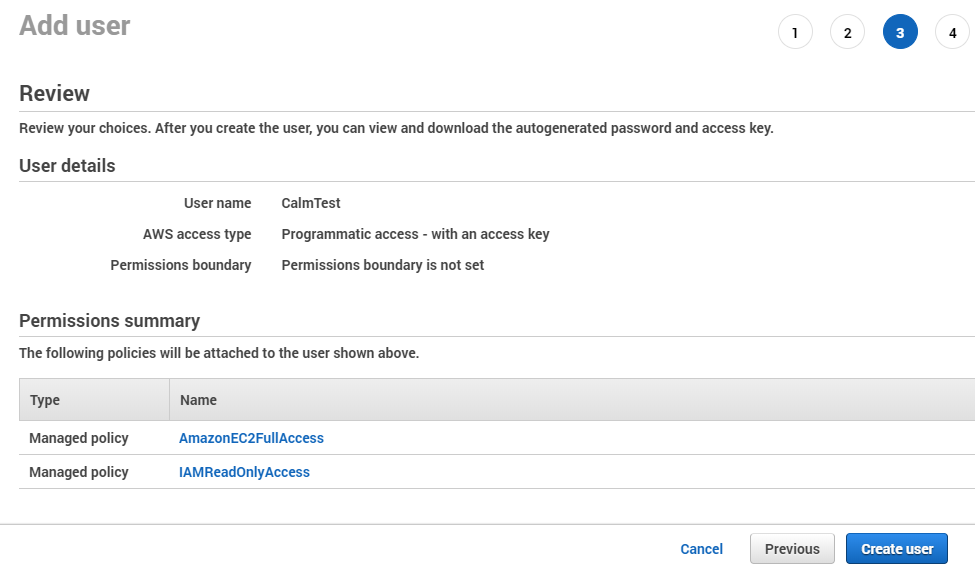
Enter the User name of your new user. In our example, we’ll use CalmTest.
Under AWS access type, select Programmatic access and then click Next: Permissions
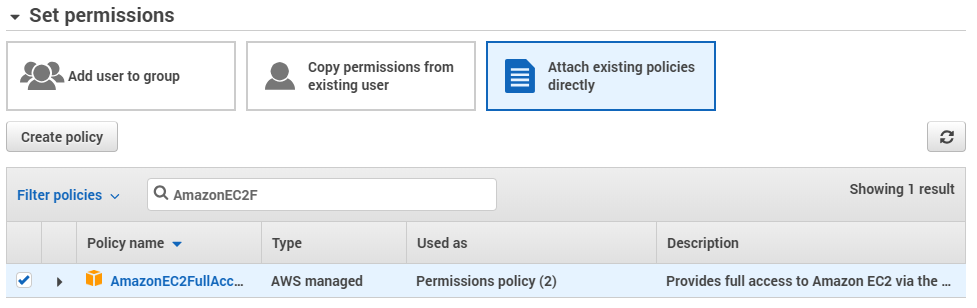
On the permissions page, click Attach existing policies directly and then search for AmazonEC2FullAccess in the filter text box. Click the checkbox next to this policy.
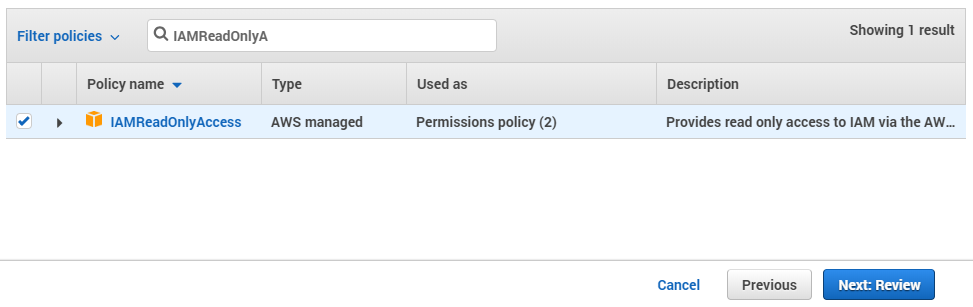
Now search for IAMReadOnlyAccess and click the checkbox. Click Next: Review
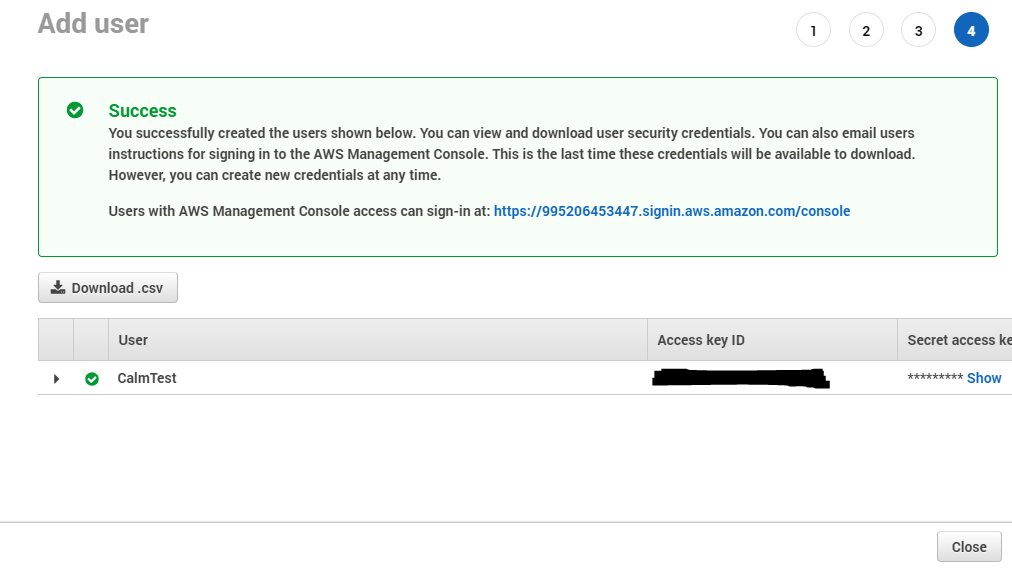
Review the information and click Create user.
On the next page, you will see the User, Access key ID and Secret access key. You can also click Download .csv to save this info to your machine.
Part 2: Create Key Pair
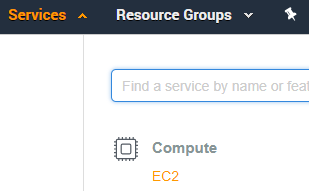
Click Services and EC2 under Compute
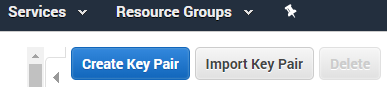
In the EC2 Dashboard, click Key Pairs

Click the Create Key Pair button
Give the key pair a name and click Create
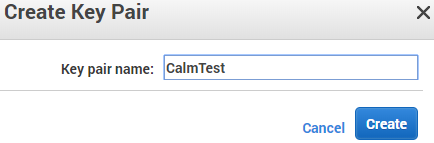
Once you click Create, the key will download automatically
![]()
At this point, we need to generate the Public Key from our Key Pair. I am a Windows user, so I will use Windows Subsystem for Linux (WSL) to retrieve the public key. If you’re not familiar with how to use WSL, please see this doc: https://docs.microsoft.com/en-us/windows/wsl/install-win10.
Open WSL and copy the pem file to /home/<youruser>/.ssh/
|
1 |
cp -a /c/CalmTest.pem /home/<youruser>/.ssh/ |
Change directory to /home/<youruser>/.ssh/
|
1 |
cd /c/ |
Change the permissions of the file to 400
|
1 |
sudo chmod 400 CalmTest.pem |
Now we can generate the Public Key
|
1 |
ssh-keygen -y -f CalmTest.pem |
Copy the output
|
1 |
ssh-rsa AAAAB3NzaC1yc2EAAAADAQABAAABAQCRAQbeHf9XqdSY4NxU9IkzzJaIqlzNPumIQO/TLaVix+2PtH0XUo9zjgtMNxc4k98Rmj4nxdpoj7ppI9ocAKmbwbUNZ2jrwbeXuKBYil/uphURwfXwdjriVl5Hlui/Dnp3z9EzvDG/sN+jooKWS0blSQrnhSZF3W2riY6mtHrpfO1rqeeNZNSsx0a9rO+DiPVlMbPdmGb14OmNrscJaMA2+egFrrB/TMFhURfecwhYYXZNHXbCjUo8vzrlXe0I0UqGZNZ8ic4qD0h3eHcpRVI5sw/Qdag5VjvWJayZCKK94VGkh92/brs1oFZZjYElnYJMtEYuXcqVVnmU+6LbI2jb |
Part 3: Create Security Group
In the EC2 Dashboard, click Security Groups
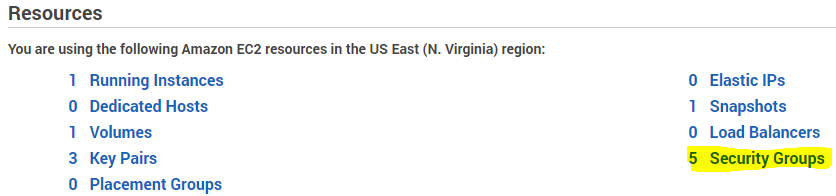
Click the Create Security Group button
![]()
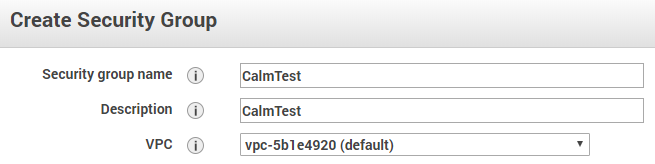
Give your security group a name and description. Select a VPC if you’ve created one or leave default
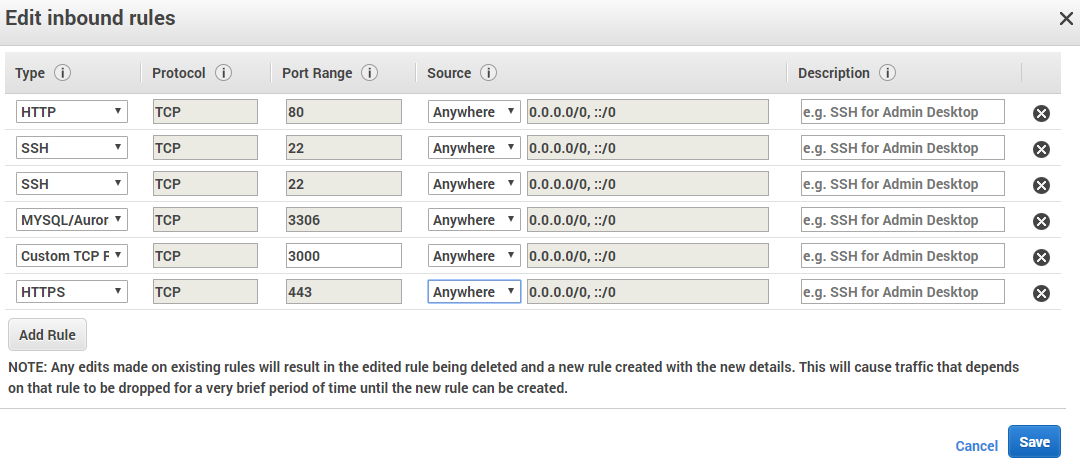
Under Security group rules click Add Rule
Select SSH with source Anywhere
Without this, Calm will not be able to reach this VM. Add any other rules you may want (e.g. HTTP, HTTPS, etc…). For our example blueprint, we need HTTP, SSH, MySQL, Port 3000, and HTTPS. Click Create when done adding rules
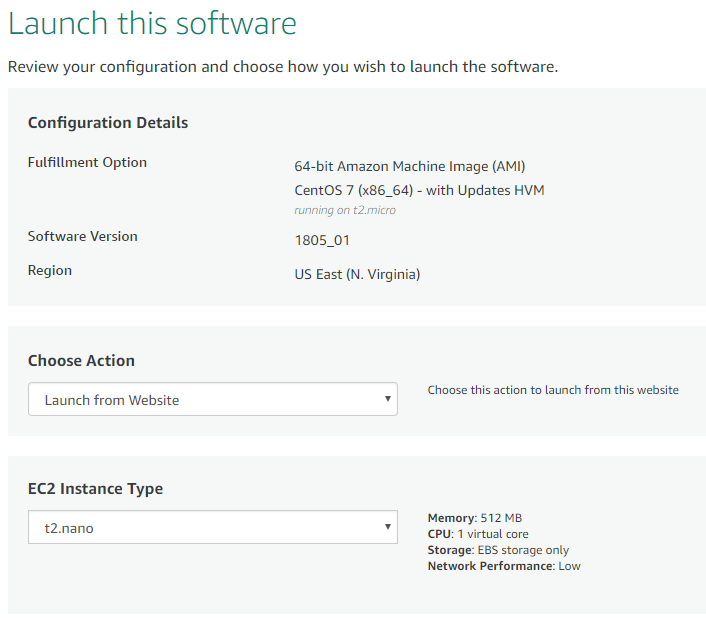
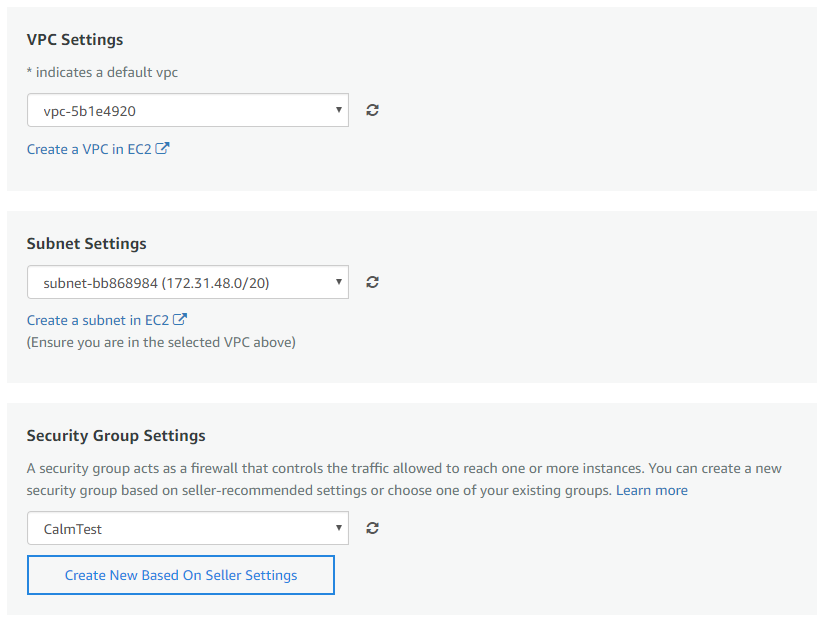
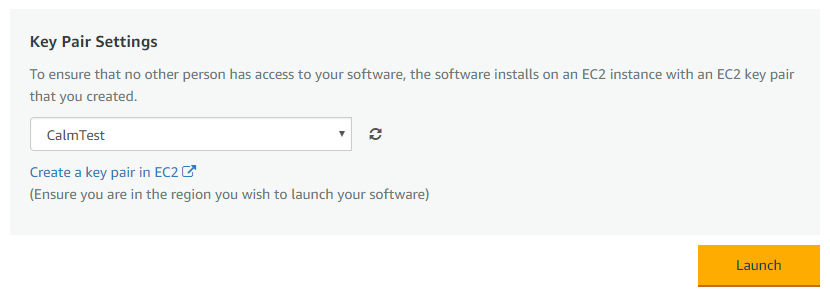
Part 4: Create AMI
To save time, we’re going to use this AMI: https://aws.amazon.com/marketplace/pp/B00O7WM7QW?qid=1534358786771&sr=0-1&ref_=brs_res_product_title
Click the link, click Continue to Subscribe, Continue to Configuration, Continue to Launch
On the Launch this software page, select the following options
- Action: Launch from Website
- Type: t2.nano
- Leave VPC, Subnet as default
- Security Group: CalmTest
- Key Pair: CalmTest
Click Launch
Go back to your EC2 Dashboard
Click the checkbox next to the instance you just created and click Connect
Using your bash console from earlier, try to connect to the VM. Please note the username is centos NOT root. AWS will give you the following connection string
|
1 |
ssh -i "CalmTest.pem" centos@xxx.compute-1.amazonaws.com |
IF YOU CANNOT CONNECT, NEITHER CAN CALM!
![]()
After validating connectivity, go back to the EC2 Dashboard and click the Actions button, hover over Image and then click Create Image
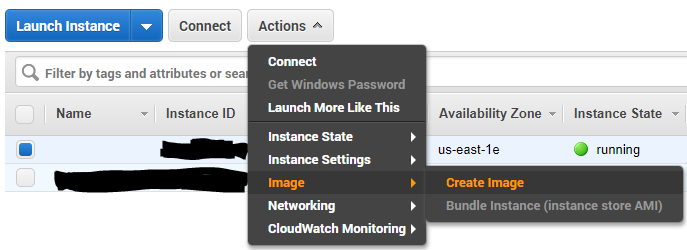
Give the image a name, e.g. calmtest-centos7 and click Create Image
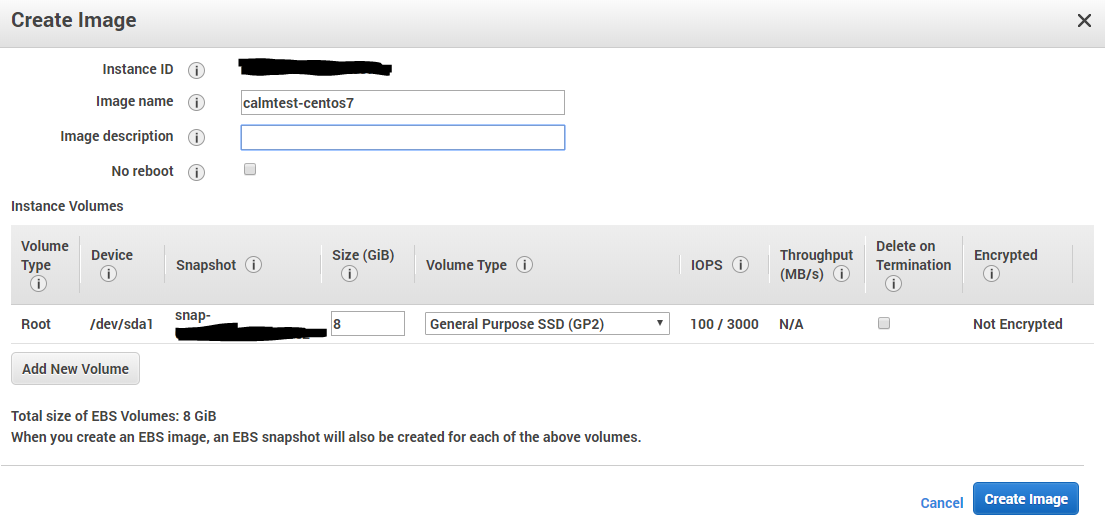
Click on Snapshots in the EC2 console and wait for the snapshot Status to be listed as completed

After the snapshot is completed, go back to the EC2 Instances, click the checkbox next to the instance, click Actions, Instance State, Terminate
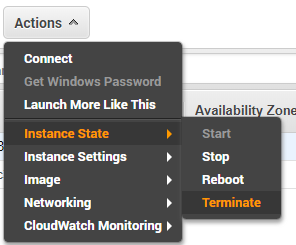
Click Yes, Terminate when prompted
Part 5: Connect Calm to AWS
Login to Prism Central and click Apps (Apps was renamed Calm as of 5.9)
![]()
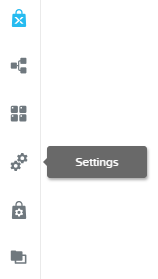
Click Settings gears on the left menu
Click + Add Setting
![]()
In the new menu on the right, give the account a Name, select AWS as the Type and enter your Access Key ID and Secrete Access Key that we created earlier (Part 1). You can include all of the regions or remove all but the one you’re going to use. In this example, we’ll use us-east-1. Click Save
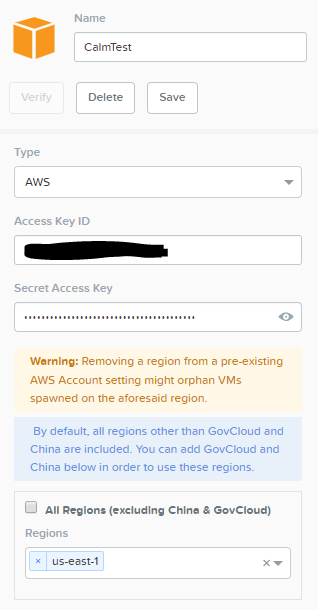
After saving, click Verify to verify connectivity. Once verified, the account will be added to the Cloud list

Part 6: Setup Project
Click Projects folders on the bottom left menu. Click on the Environment tab
In the Instance Name, enter the following. This will generate random names for us
|
1 |
-@@{calm_array_index}@@-@@{calm_time}@@ |
Fill out/select the rest of the form with the following
Under Credential dropdown, select Add New Credential. Select Key as Secret Type and enter the private key you created in Step 2. Click Save


Part 7: Setup & Deploy Blueprint to AWS
Browse to https://raw.githubusercontent.com/OptimalZ06/calm/master/AWS-UPTICK.json and save the json file/data to your machine.
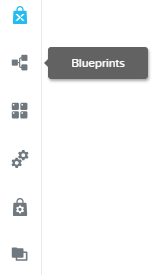
Inside Prism Central, click the Blueprints menu on the left
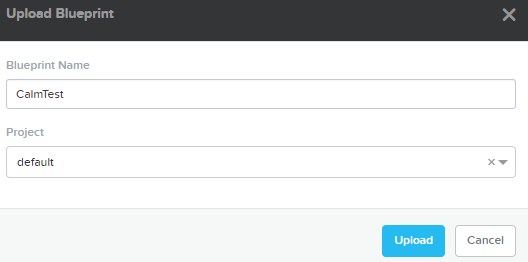
Click the Upload Blueprint button and select the json file we downloaded earlier
![]()
In the new window, give the Blueprint a name and select default as the project. Click Upload
Once the blueprint has been uploaded, the blueprint editor will load. Click on Credentials
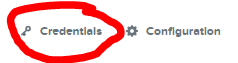
Expand CENTOS credential and provide your private key
Click Back once complete
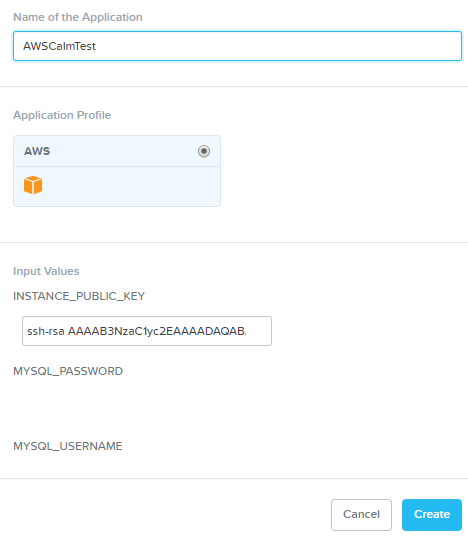
Click on the AWS Application Profile and enter your public key in the INSTANCE_PUBLIC_KEY variable and enter nutanix4u as the MYSQL_PASSWORD. Do not use any special characters for the MYSQL_PASSWORD for this blueprint.
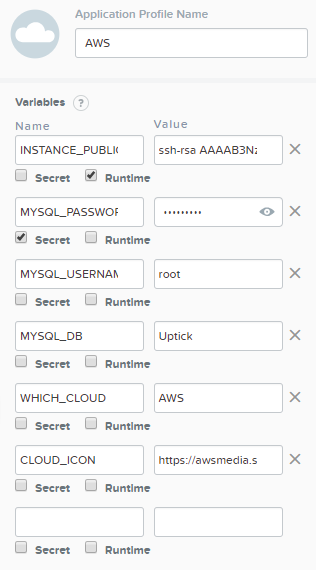
Click Save

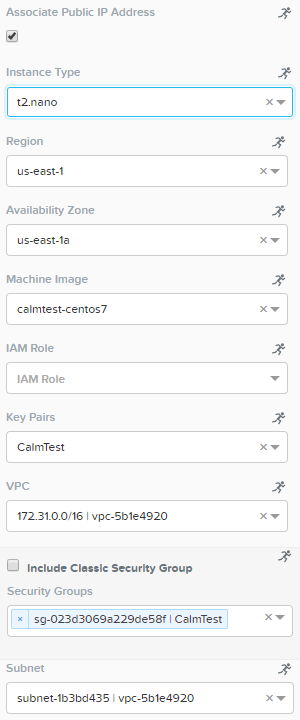
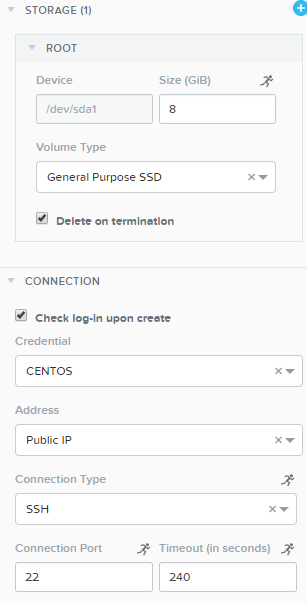
Click all of the application services (the cards) and make sure the VM has the following settings.
Once all the services are setup and saved, click Launch.
In the Name of the Application text box, enter AWSCalmTest and click Create
Browse back to your AWS Console and monitor the EC2 Instances for VM creation
Once the AWSCalmTest has finished deploying, click the Services tab and then click the HAPROXY service
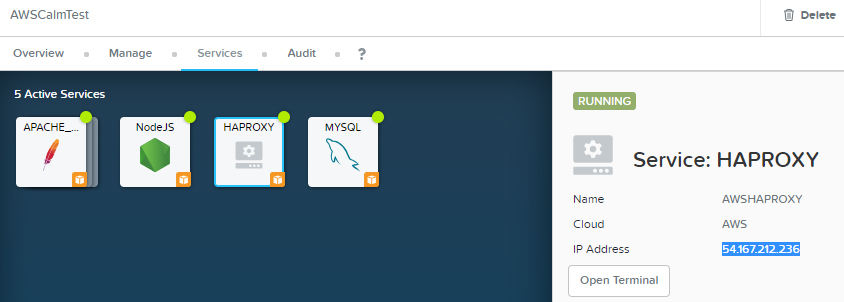
Copy the HAXPROXY IP Address and enter it into a browser. If everything is working correctly, you should be able to click Search and pull up results.